If your Tails is broken and you are trying to recover your Persistent Storage, see recovering the Persistent Storage of a broken Tails instead.
Creating a backup Tails USB stick using Tails Cloner
We recommend you to create another Tails to store your backup by cloning from your current Tails. This way, if your Tails is lost or damaged, you can replace it immediately with your backup Tails.
Start on the Tails USB stick that you want to back up and clone from.
When starting Tails, unlock your Persistent Storage.
Plug in the new USB stick on which you want to create your backup Tails USB stick and clone to.
Выберите Приложения ▸ Tails ▸ Клонировщик Tails.
Turn on the option Clone the current Persistent Storage below the option Clone the current Tails.
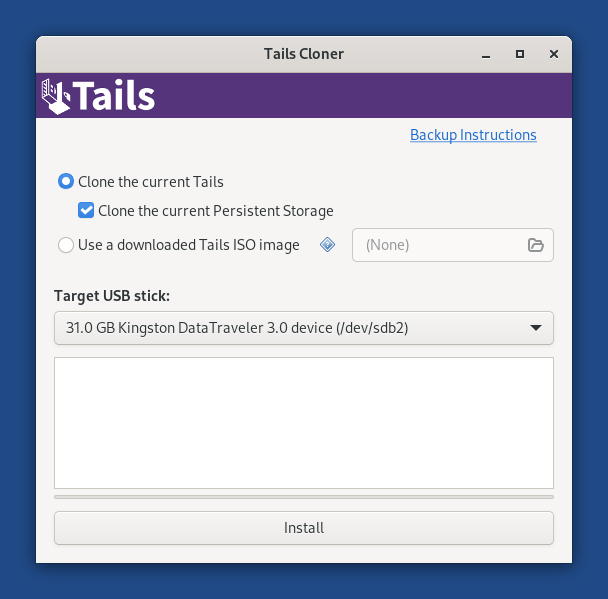
Make sure that the new USB stick is selected in the Target USB stick menu.
To start the cloning, click on the Install button.
Read the warning message in the confirmation dialog.
Enter a passphrase for the Persistent Storage on the new USB stick in the Passphrase text box.
Enter the same passphrase again in the Confirm text box.
Click Continue.
Click Delete All Data and Install to confirm.
Cloning takes a few minutes.
The progress bar usually freezes for some time while synchronizing data on disk.
Updating your backup Tails using the Back Up Persistent Storage utility
Start on your current Tails.
When starting Tails, unlock your Persistent Storage.
Подключите флешку для резервной копии Tails.
Выберите Приложения ▸ Системные ▸ Дублировать Постоянное хранилище.
При каждом обновлении резервной копии обновляются только изменённые файлы.
If your backup Tails has an outdated version of Tails, we recommend you upgrade it by cloning your current Tails using Tails Cloner. For detailed instructions, see how to manually upgrade from another Tails.
Updating your backup Tails from a Console
If you prefer updating your backup Tails from a Console:
Start on your current Tails.
When starting Tails, set up an administration password.
Choose Apps ▸ Accessories ▸ Files to open the Files browser.
Подключите флешку для резервной копии Tails.
A new encrypted volume appears in the sidebar of the Files browser. Click on it and enter the passphrase of your backup Tails to unlock the volume.
Execute the following command in a Console.
sudo rsync -PaSHAXv --del /live/persistence/TailsData_unlocked/ /media/amnesia/TailsData
When the command finishes, it displays a summary of the data that was copied. For example:
sent 32.32M bytes  received 1.69K bytes  21.55M bytes/sec
total size is 32.30M  speedup is 1.00