If instead, your Tails USB stick doesn't start, refer to our instructions on recovering data from the Persistent Storage when Tails doesn't start.

Tails can try to fix these errors, but this might erase some of your data and take a long time.
That is why, if you cannot restore from a recent backup, we recommend that you create a partition image of your Persistent Storage before attempting to repair the file system of your Persistent Storage from the Welcome Screen.
Most of the time, repairing the file system will work fine and will be enough to fix your Persistent Storage.
In the rare cases when repairing the file system will not work, you might be able to recover some or most of your data from this partition image using advanced forensics tools. This recovery process is very technical and you might need help from someone experienced with data recovery.
- Recovering data from the Persistent Storage when it has file system errors
- Creating a partition image of your Persistent Storage
- Recovering data from the Persistent Storage
Creating a partition image of your Persistent Storage
A partition image is a copy of your entire Persistent Storage in a single file that you can save to an external hard disk from Tails.
To save the partition image outside of Tails, you need an external hard disk with as much free space as the size of your Persistent Storage, usually 8 GB less than your Tails USB stick. You can also use another USB stick of the same size as your Tails USB stick, but writing to a USB stick is usually much slower than writing to a hard disk.
The partition image contains a decrypted version of your Persistent Storage.
We recommend that you save the partition image to an encrypted hard disk.
We are presenting here 2 different techniques to create a partition image of your Persistent Storage.
Create a partition image using the Disks utility
Try this technique first if the hardware of your USB stick is not failing.
Create a partition image using
ddrescueon the command lineTry this technique first if the hardware of your USB stick is failing.
Using
ddrescueis more difficult but is better than the Disks utility to recover data if the hardware of your USB stick is failing.
Creating a partition image using the Disks utility
When the hardware of your USB stick is not failing, using the Disks utility is the simplest way of creating a partition image of your Persistent Storage.
Preparing the external hard disk
Start Tails.
In the Welcome Screen:
Choose to start without unlocking your Persistent Storage.
Choose Apps ▸ Accessories ▸ Files to open the Files browser.
Plug in the hard disk on which you want to save the partition image of your Persistent Storage. You need as much free space as the size of your Persistent Storage, usually 8 GB less than your Tails USB stick.
A new volume appears in the sidebar of the Files browser.
Right-click (on Mac, click with two fingers) on the new volume that appeared in the sidebar of the Files browser and choose Properties in the shortcut menu.
Take note of the free space in the volume.
Identifying your Persistent Storage in the Disks utility
Choose Apps ▸ Utilities ▸ Disks to open the Disks utility.
In the left pane of the Disks utility, identify your Tails USB stick in the list of storage devices.
Verify its brand and size.
In the left pane, click on the storage device that corresponds to your Tails USB stick.
In the right pane, this storage device should have 2 volumes, corresponding to 2 partitions on the USB stick.
1 volume with a Tails label and FAT content.
This volume corresponds to the system partition of your Tails.
1 volume with a TailsData label and LUKS content.
This volume corresponds to the encrypted version of your Persistent Storage.

In the right pane, click on the volume that corresponds to your Persistent Storage.
Verify that the content of the volume is of type LUKS Encryption.
Unlocking your Persistent Storage in the Disks utility
Before creating the partition image, unlock the encryption to access the decrypted version of your Persistent Storage. To do so:
Click
 .
.In the Enter passphrase to unlock dialog, enter the passphrase of your Persistent Storage.
Click Unlock.
In the Authentication Required dialog, enter your administration password.
If unlocking fails at this step, your Persistent Storage is so damaged that decryption is impossible, making all your data completely unrecoverable.
In the right pane, click on the new volume that appears below the LUKS volume.
Verify that the content of the new volume is of type Ext4.
This volume corresponds to the decrypted version of your Persistent Storage.
Verify that the size of your decrypted Persistent Storage is smaller than the available free space in the external hard disk.
Take note of the device name of your Persistent Storage.
The device name is composed of
/dev/mapper/luks, followed by letters and numbers.
Creating the partition image
Choose
 ▸ Create Partition Image.
In the Create Disk Image dialog:
In the Name field, specify persistent-storage.img.
In the Save in Folder menu, choose the external hard disk to which you want to save the partition image.
Click the Start Creating button.
In the Authentication Required dialog, enter your administration password.
After the creation of the partition image finishes:
If the creation succeeded, shutdown Tails.
You can now safely start recovering data from the Persistent Storage.
If the creation failed, try the second technique described below to create a partition image using
ddrescueon the command line instead.
Creating a partition image using ddrescue on the command line
If creating a partition image using the Disks utility fails, you can try
this second technique using ddrescue, which can be more resilient to
hardware failures.
The ddrescue utility tries to copy first the parts of the Persistent
Storage that are not failing and skips over the parts that are
failing. After that, you can run ddrescue again to try to copy the parts
that failed the first time.
Choose Apps ▸ Accessories ▸ Files to open the Files browser.
In the Files browser, navigate to the folder of the external hard disk where you want to save the partition image of your Persistent Storage.
Right-click in the empty space of the right pane and choose Open in Console in the shortcut menu.
Doing so opens a console that is configured to operate in this folder.
In the console, execute the following command. Replace /dev/mapper/luks-xyz with the device name found when identifying your Persistent Storage in the Disks utility.
sudo ddrescue /dev/mapper/luks-xyz persistent-storage.img ddrescue.log
The output of
ddrescuelooks like this:GNU ddrescue 1.29 Press Ctrl-C to interrupt ipos: 749404 kB, non-trimmed: 0 B, current rate: 34996 kB/s ipos: 1446 MB, non-trimmed: 0 B, current rate: 24772 kB/s opos: 1446 MB, non-scraped: 0 B, average rate: 33629 kB/s non-tried: 9290 MB, bad-sector: 0 B, error rate: 0 B/s rescued: 1446 MB, bad areas: 0, run time: 43s pct rescued: 13.46%, read errors: 0, remaining time: 1m 31s time since last successful read: 0s Copying non-tried blocks... Pass 1 (forwards)The section about bad areas refers to errors reading the data of your Persistent Storage, most likely because of hardware failures.
After
ddrescuefinishes:If bad areas were reported, try leaving your USB stick to rest for some minutes and executing the same
ddrescuecommand again to copy more data.We recommend that you replace your USB stick and copy the partition image to a new USB stick after you execute
ddrescueseveral times.If no bad areas were reported or if the same bad areas were reported after several executions of the
ddrescuecommand, it means that all the data that could be rescued was copied to the partition image.
Shut down Tails.
You can now safely start recovering data from the Persistent Storage.
Recovering data from the Persistent Storage
After creating a partition image, you can safely try to recover data from your Persistent Storage without risking erasing more data.
We are presenting here 3 recovery techniques that work in different cases. We recommend that you try the 3 techniques one after the other.
Repairing the file system from the Welcome Screen
If the hardware of your USB stick is not failing, repairing the file system from the Welcome Screen is likely the easiest technique.
Copying the partition image to a new USB stick
If the hardware of your USB stick is failing, you might still be able to repair the file system of your Persistent Storage after copying the partition image to a new USB stick.
Analyzing the partition image using Autopsy
Autopsy is an advanced digital forensics tool that allows recovering files, even from broken file systems.
Repairing the file system from the Welcome Screen
If the hardware of your USB stick is not failing, repairing the file system from the Welcome Screen is likely the easiest technique.
Start on the Tails USB stick that has file system errors.
In the Welcome Screen, try to unlock the Persistent Storage.
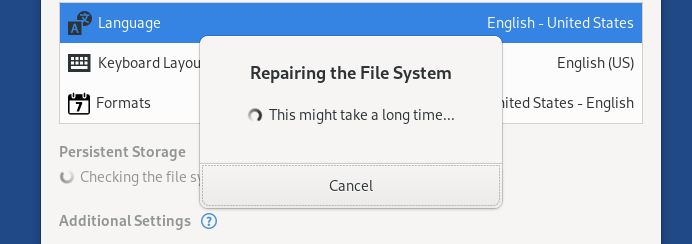
When the error message about file system errors appears, click on the Repair File System button.
The repair of the file system starts.
The repair can take a long time, from a few seconds to several hours.
If the repair takes more than a day, shutdown Tails and try analyzing the partition image using Autopsy instead.
After the repair finishes:
If the repair succeeded, start Tails and verify the content of your Persistent Storage.
We recommend that you keep the partition image for some time.
If you realize later on that some files are missing or damaged, you might be able to recover them by analyzing the partition image using Autopsy.
If the repair failed, try to copy the partition image to a new USB stick as described below.
Copying the partition image to a new USB stick
If the hardware of your USB stick is failing, you might still be able to repair the file system of your Persistent Storage after copying the partition image to a new USB stick.
Creating a new Tails USB stick with Persistent Storage
Install Tails on a new USB stick.
The new USB stick must be at least as large as your current Tails USB stick.
Start on the new Tails.
When starting Tails, set up an administration password.
Create a Persistent Storage on the new Tails.
Close the Persistent Storage settings after creation, when the list of features is displayed.
The process described below overwrites the contents and configuration of the new Persistent Storage. So, it does not matter which features you turn on after creating the Persistent Storage.
Copying the partition image onto the new USB stick
Choose Apps ▸ Utilities ▸ Disks to open the Disks utility.
In the left pane of the Disks utility, identify your new Tails USB stick in the list of storage devices.
Verify its brand and size.
In the left pane, click on the storage device that corresponds to your new Tails USB stick.
In the right pane, this storage device should have 3 volumes.
1 volume with a Tails label and FAT content.
This volume corresponds to the system partition of your Tails.
1 volume with a TailsData label and LUKS content.
This volume corresponds to the encrypted version of your Persistent Storage.
1 volume with a TailsData label and Ext4 content.
This volume corresponds to the decrypted version of your Persistent Storage.
In the right pane, click on the Ext4 volume, which is the one that corresponds to the decrypted version of your Persistent Storage.
In the attributes below the volume, verify that its device is /dev/mapper/TailsData_unlocked.
Click on the
 button to unmount the
Persistent Storage.
button to unmount the
Persistent Storage.Plug in the hard disk on which you saved the partition image of your Persistent Storage.
Choose
▸ Restore Partition Image.In the Restore Disk Image dialog, browse for the partition image on the hard disk that you plugged in.
Click on the Start Restoring button.
After the restoration finishes, restart on the new Tails USB stick.
Fixing the file system errors on the new USB stick
In the Welcome Screen, try to unlock the Persistent Storage.
If an error message about file system errors appears, click on the Repair File System button.
The repair of the file system starts.
The repair can take a long time, from a few seconds to several hours.
If the repair takes more than a day, shutdown Tails and try analyzing the partition image using Autopsy instead.
After the repair finishes:
If the repair succeeded, start Tails and verify the content of your Persistent Storage.
We recommend that you keep the partition image for some time.
If you realize later on that some files are missing or damaged, you might be able to recover them by analyzing the partition image using Autopsy.
If the repair failed, try to analyze the partition image using Autopsy as described below.
Analyzing the partition image using Autopsy
Autopsy is an advanced digital forensics tool that allows recovering files, even from broken file systems.
Autopsy is open source and available for free on Windows, macOS, and Linux.
To avoid leaving traces of the content of your Persistent Storage on the operating system where Autopsy is used, we recommend that you use Autopsy in Tails. But, Autopsy is easier to install in Windows than in Tails.
We are not providing step-by-step instructions on how to install and use Autopsy.
If you don't feel confident installing and using Autopsy on your own, we recommend that you get help from someone with more experience with Linux and data recovery.
You can also read the Autopsy User Documentation.
Installing Autopsy in Tails
The general steps are:
From the download page, download the 2 binaries needed to run Autopsy:
The DEB file of The Sleuth Kit.
The ZIP file of Autopsy.
From the installation instructions of Autopsy for Linux, download the 2 scripts needed for the installation:
install_prereqs_ubuntu.shinstall_application.sh
Execute the following commands in a Console. Replace version with the version number of The Sleuth Kit and Autopsy that you downloaded.
sudo apt install libsqlite3-dev libc3p0-java unzip openjdk-17-jdk/unstable openjdk-17-jre/unstable
sudo bash install_prereqs_ubuntu.sh
sudo dpkg -i sleuthkit-java_version_amd64.deb
bash install_application.sh -z autopsy-version.zip -i ~/Persistent/autopsy -j /usr/lib/jvm/java-17-openjdk-amd64
/home/amnesia/Persistent/autopsy/autopsy-version/bin/autopsy
When starting for the first time, Autopsy freezes on Starting modules.
Press Enter to continue.
Using Autopsy to analyze the partition image
The general steps are:
Start Autopsy.
Open a new case.
Add the partition image of the Persistent Storage as a data source.
Autopsy analyzes the data source.
After the analysis finishes, the files that were recovered are listed in different ways in the left sidebar, for example, both as a file system tree and by type of files.
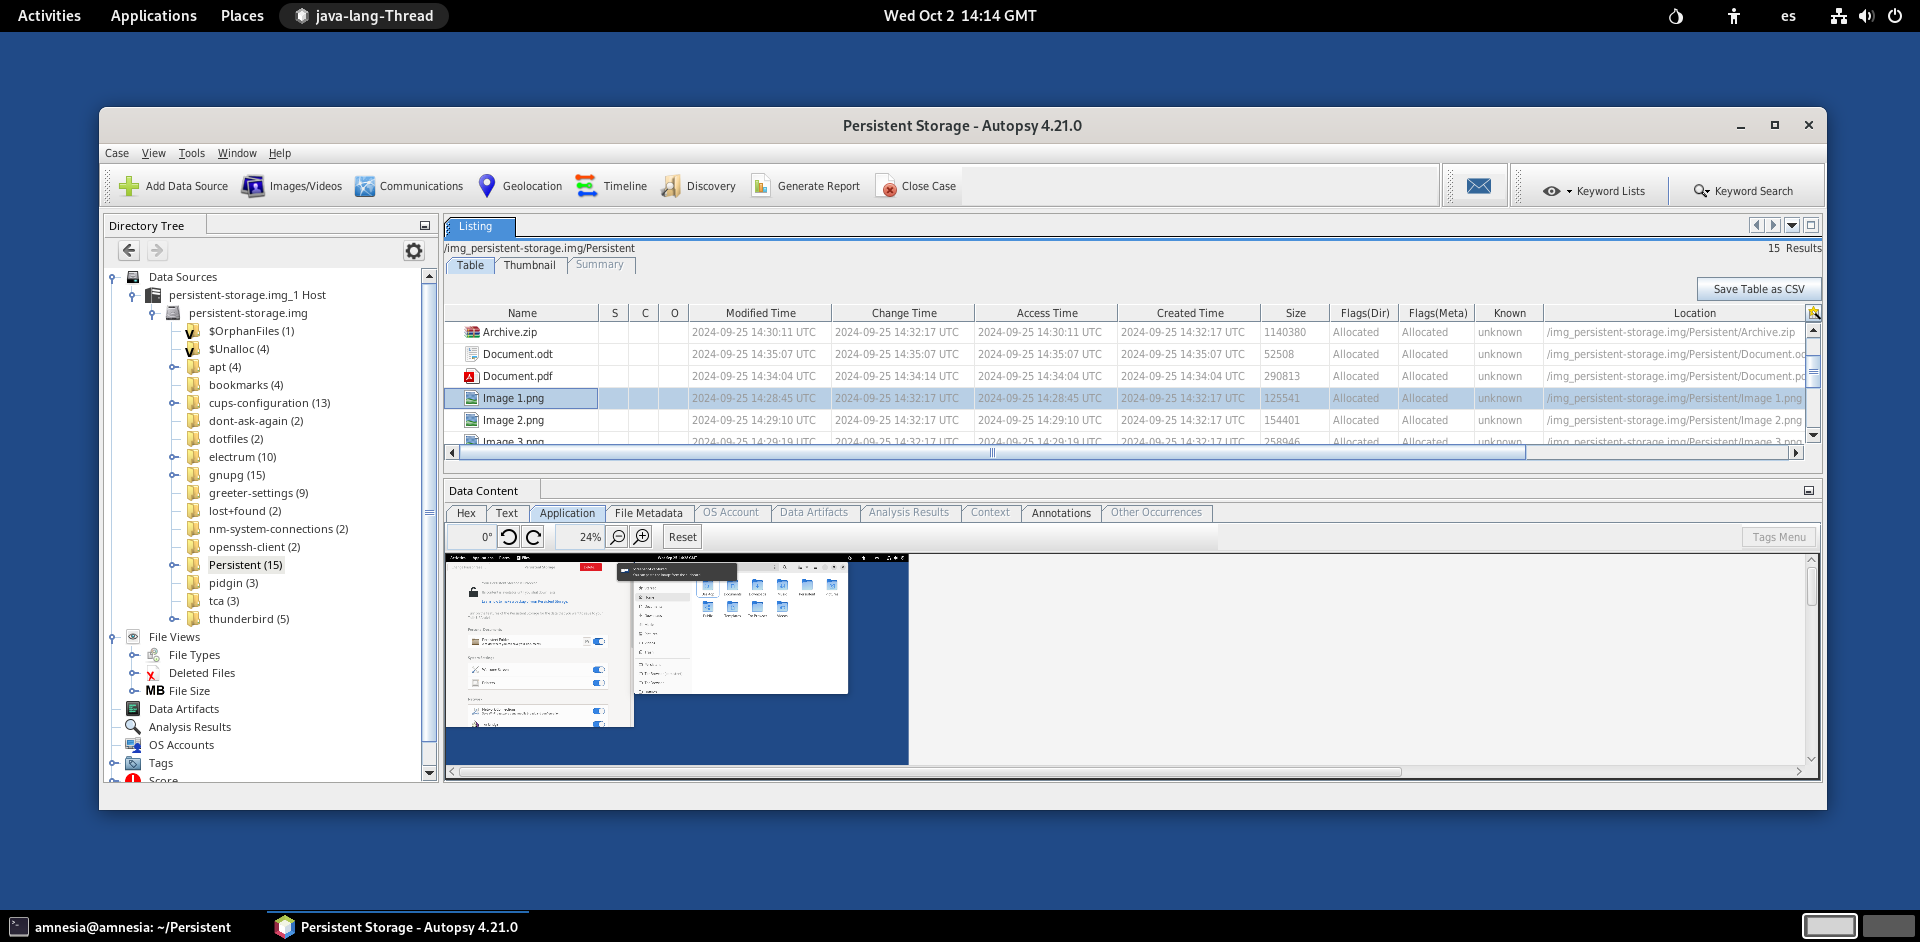
Extract the files that you want to recover to the case folder.